Test your REST API using Postman
Write tests for your REST API

API Testing is a crucial step of your API(Application Programming Interface) development life cycle because testing ensures that end-to-end functionality works properly. Also, it verifies that API satisfies the application end-user business requirement. In order to do API testing here are some commonly used API testing tools:
- Postman
- JMeter
- Eclipse IDE Java SDK tool
- Test Manager
Out of those, I’m going to discuss about postman as an API testing tool which is a handy tool that gave me a super cool experience while API testing.
Postman Request Flow

As shown in the above diagram, there are four main steps in the postman request flow. I’m sure, I don’t surprise to see Request and Response in this flow, but you may not know about the Pre-request Script and Test script.
- Pre-request scripts
These scripts always run before the request and they are written in Javascript. There can be pre-request scripts at the postman collection level and postman request level.
collection level pre-request scripts run before every request in the collection, and request level pre-request script runs before the specific test.


- Test
These scripts always run after the request’s response is returned. They are written in Javascript. Similar to pre-request scripts we can write test scripts at the collection level as well as at the request level. The collection level tests run after every request and the request level tests run only after the specific request execution. The editor next to the pre-request script is for the test script.
With the aid of pre-request and test scripts we can:
- Pass variables from one request to another
- Assert the response of the executed request
- Automate the request flows
📝 Postman Test Case Writing
Postman has a newer PM API to write test case easily. There is an example for a test case written with pm.test() .
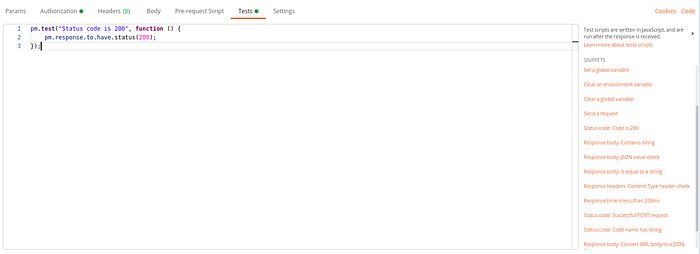
pm.test("Status code is 200", function () {pm.response.to.have.status(200);});
pm.test() expectes two parameters:
- Name of the testcase
- Function that returns a boolean (
trueorfalse) value indicating whether the test passed or failed.
You can use ChaiJS BDD syntax and pm.expect in your assertions to test the response detail. This assertion library has very good readability which I admire when writing postman tests. You can refer to the postman official site to learn the test script examples in a huge variety.
When you go into Test Tab, you may get stuck on thinking about how to start this… Postman will help you. On the right-hand side, you can see a common set of templated test scripts. The one I have selected here is the “status code: Code is 200” test. Simply click on the test case out of the list of snippets templates, then it will appear in your test tab.
I will show you how I get started on writing tests for SCIM API in WSO2 Identity Server.
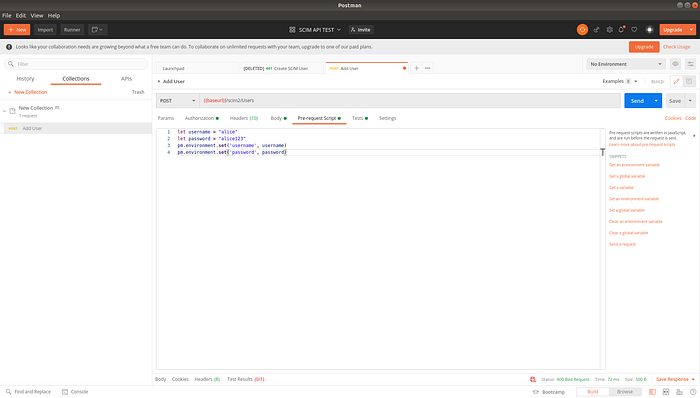
- I run my identity server in localhost:9443, and SCIM APIs need to be authorized by a user who has permissions to do user management. Since these are common across all SCIM requests in my collection I defined admin username, password, and base URL and set them into environment variables in the collection level pre-requests script section in order to use them in every request.

- I added the SCIM user creation request as the first request. For that, I defined the user’s username, password and set them to environment variables using the request’s pre-requests script.
- Then, my request body section looks like follows. Username and password were taken from the environment variables.
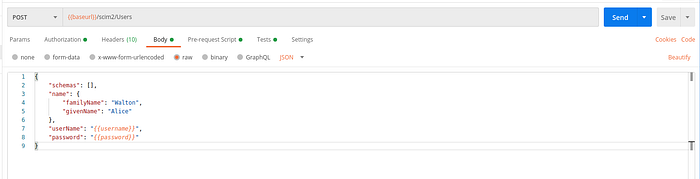
- One more thing, if you see my request URL, I have used the
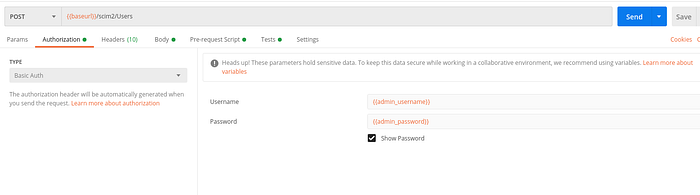
{{baseurl}}variables which I set in the collection-level pre-requests scripts. Also, I have used the username and password of the authorization section based on the defined collection-level variables.
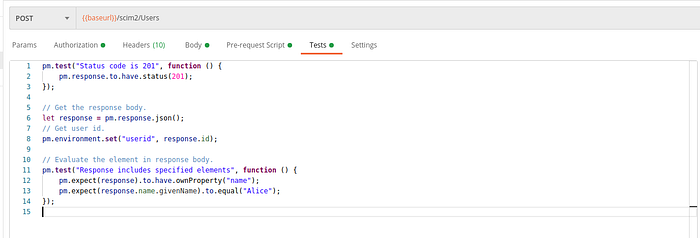
- Next, let’s pay the attention to test section.
The first test case is to validate whether the successful request execution returns 201 HTTP status code.
Then I read the response body and notice the user id generated by the server. Then, set it as an environment variable to use in the future.
The second test case is to validate some expected attributes' presence in the response body. Here I check whether the response body contains an attribute named “name” and whether that value has a sub-attribute named “givenname” which contains the value “Alice”.
- As the next request of the collection I defined
GET {{baseurl}}/scim2/Users/{{userid}}which is responsible for returning the created user in the previous request. Here you can see I used the{{userid}}variable which set into an environment variable after the previous request execution.
Here is a postman collection for the above request collection: https://app.getpostman.com/run-collection/c1c4bc67be06c55ee9b5
▶️ Postman Test Case Execution
- Upon clicking on the “Send” button, you will get the response and the test section shows how many test cases passed/failed.
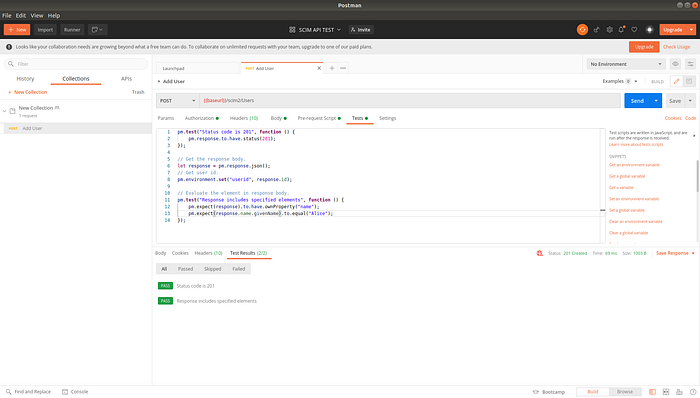
NOTE: If you want to pass variables created in one request to another request when running the request one by one manually, you should have a defined environment to save the variables. Check the right upper corner to set the environment.

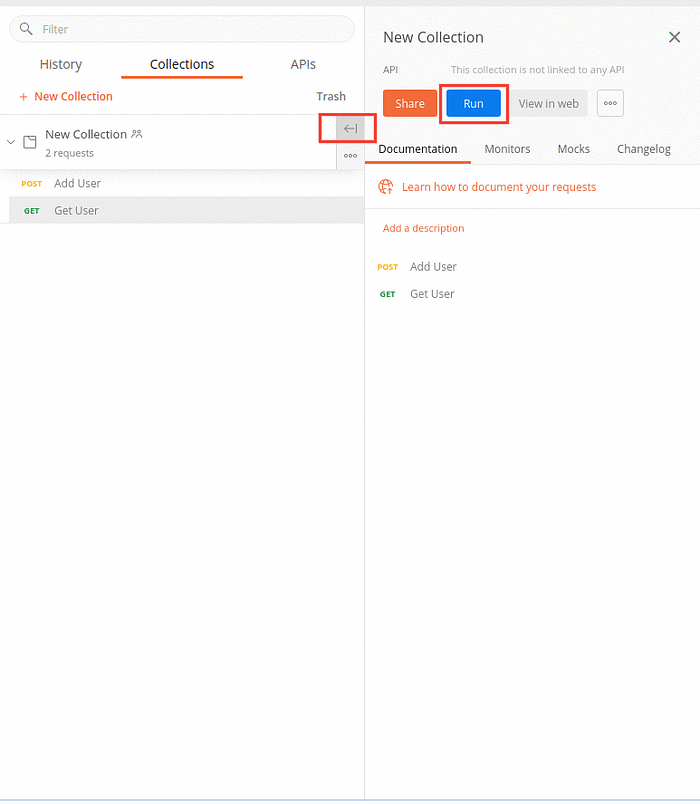
2. Execute all requests in the collection or selected requests at once.
- Save every request.
- Go to the collection and click on
|->, Then click onRunbutton.
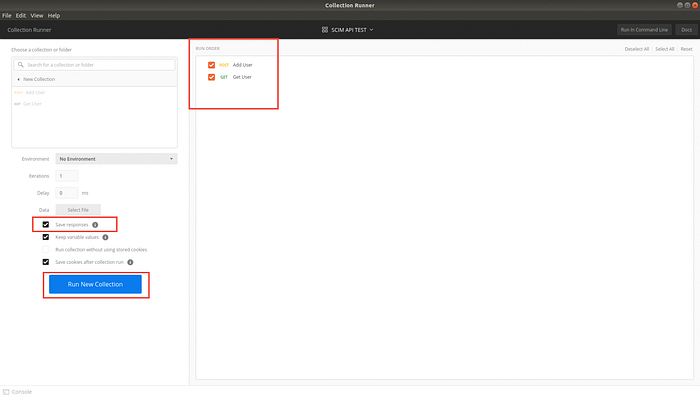
- Next, you can see the following screen. Select what are the test cases you want to execute by checking the boxes under
RUN ORDERsection. If you want to save the responses upon the request execution, tick theSave responseoption. Finally, click onRun New Collection.
- Test results will appear as follows.
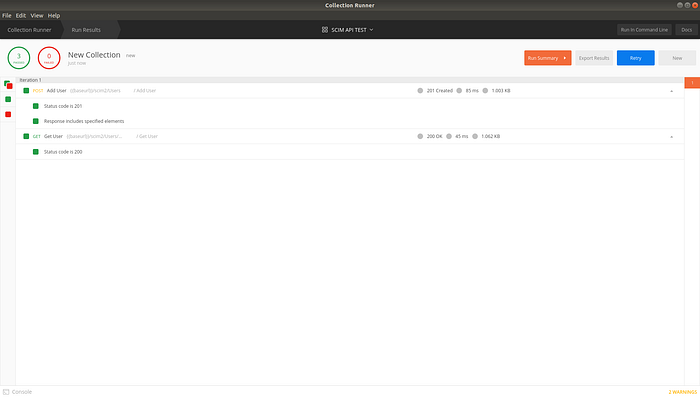
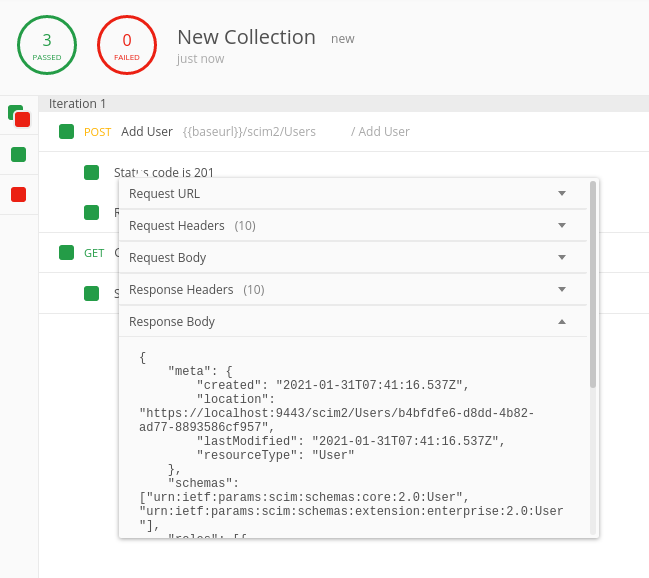
- If you have enabled,
Save responseoption, you can view the response body and response headers by clicking on the request.
↗️ Postman Test Result Exporting
- By clicking on
Export Resultbutton in result view, you can export the collection test results as a JSON file.
Here is the file for above tests: https://gist.githubusercontent.com/AnuradhaSK/9f0fefcff1b8ea047dce61b78e323e5f/raw/f89f4c840416fd59584c8a7f6428d7274d34c30a/collection-run.json
↙️ Postman Test Result Importing
- Get a new Runner window by navigating to
File->New Runner Windowor using the keyboard short cut (Ctrl + Shift + R). - Click on
Import Runson the upper right corner and select the JSON file which you have exported as mentioned in the above step (Postman Test Result Exporting).

We are done!! Test your API without any burden and deliver an error-free API.
